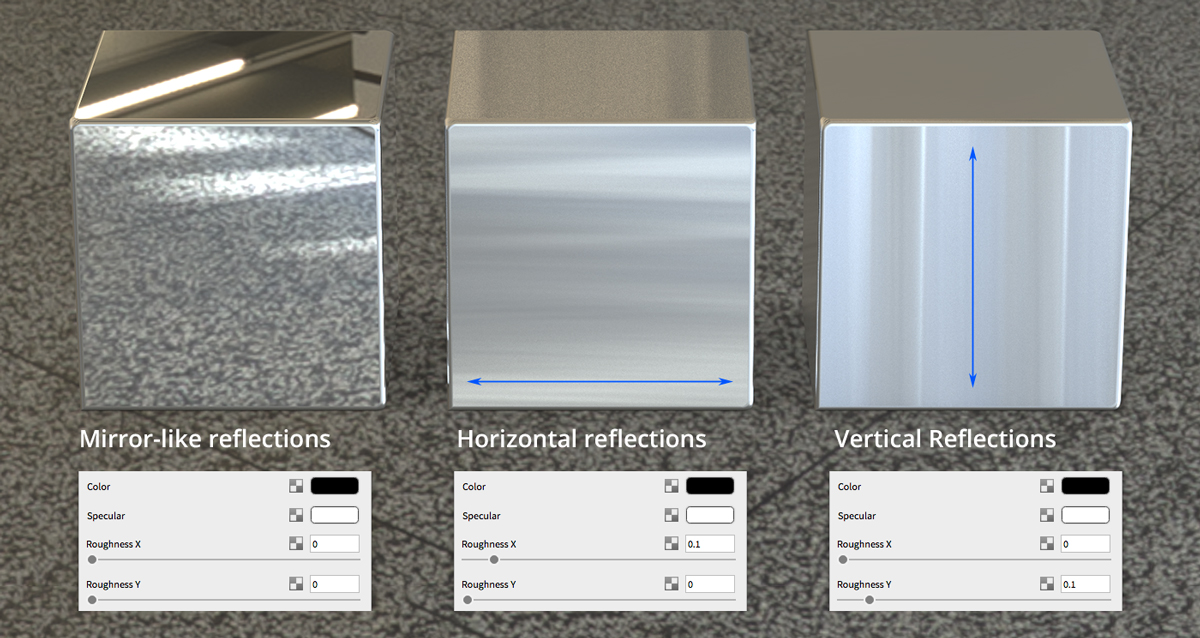
Metals draw most of their color from the objects around them, which can make them challenging to photograph or render. We describe metal colors using the Specular parameter, which controls the color of the sharp reflections.
Controlling the specularity is crucial to getting great looking metal, as well as controlling the environment or local lighting. Blown out metals usually result from overly bright lighting or having a material that’s too reflective. Lucky for us, in KeyShot we have control over both.
How to Render Axial Brush on Metals:
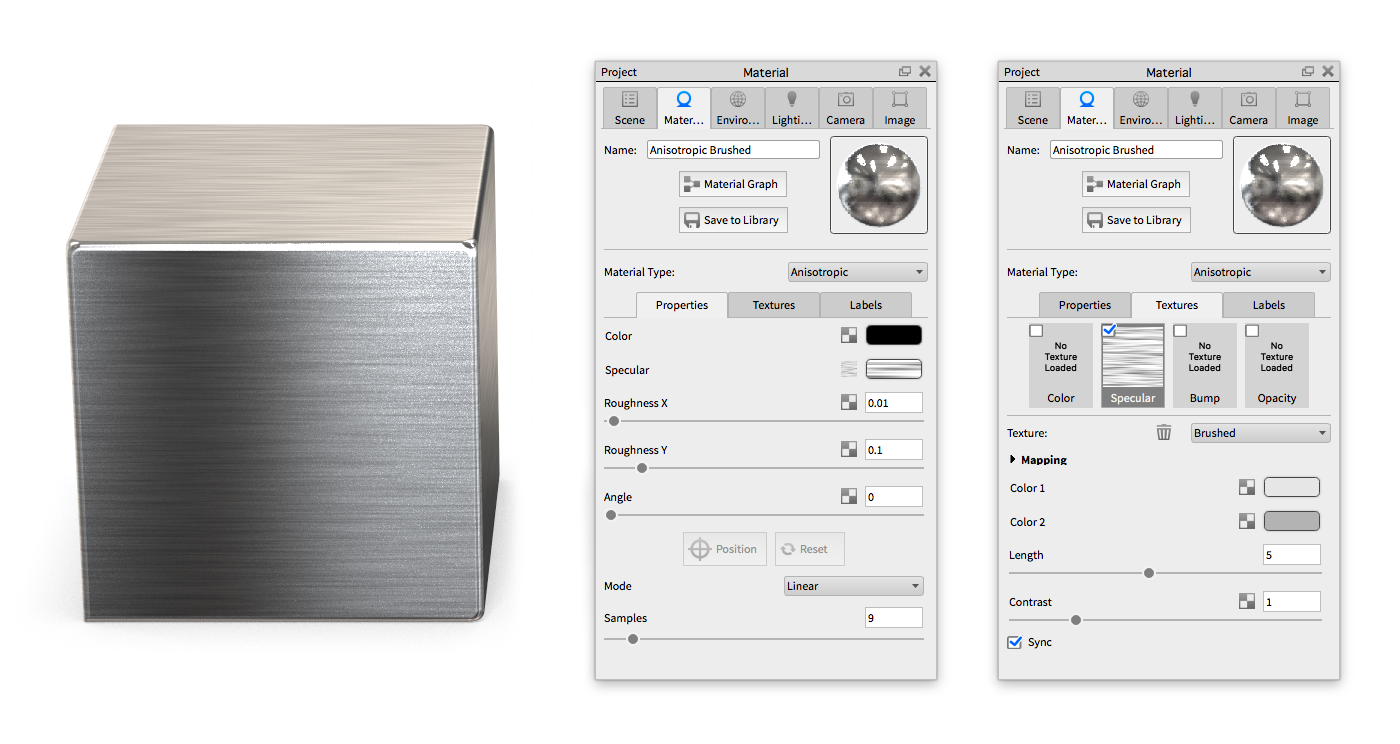
1. Change your material type to Anisotropic.
Start by applying “Chrome Black” from the material library (Materials > Metal > Chrome > Basic), then edit that material and use the Material Type dropdown to change it to Anisotropic. Since this is an advanced material, there are no preset materials for it in the material library.
2. Set your Anisotropic Color and Specular colors.
To get the best result when using the anisotropic material change Color to pure black. We’ll define the reflections using the Specular color later. For now set Specular to a light grey, such as 85% grey.
3. Set the direction of your brush strokes.
The Anisotropic material has two Roughness sliders: Roughness X and Roughness Y. By default, they will be different values, such as 0.05 for X and 0.01 for Y.
We can make the reflections more visible in a certain direction, usually perpendicular to the brush direction. Once we make this adjustment, you’ll see that even without a texture the material has the desired reflections.
Generally, it is good practice to set them to different values; as much as a factor of 10 or more (x=0.01 and y=0.1) giving us strong reflections in one direction.
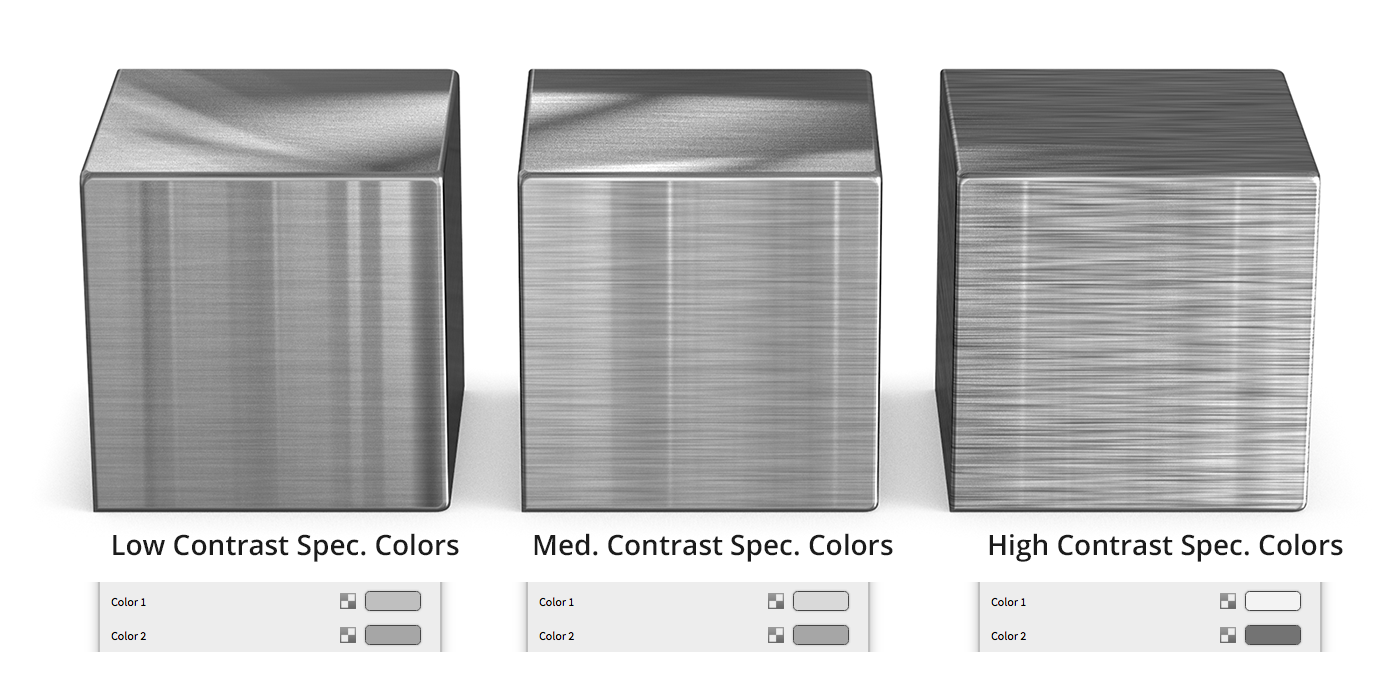
4. Add a Brushed procedural texture to the Specular channel.
To give the material a brushed appearance, we can use the built in Brushed texture to define our material’s specularity. You may have to adjust the mapping direction, scale or rotation to get the brush size and or direction where you want it. We can then use two specular colors (almost never pure black or pure white) to define the metal reflectivity as Color 1 and Color 2. In this example we have used light, neutral gray colors.
5. Set your brush temperature.
Using warm tones will allow us to more accurately recreate 201 stainless, 304 stainless, brushed nickel, etc, while cooler tones are better for aluminum or 430 stainless. You can always reference the Metals color group in the color library.
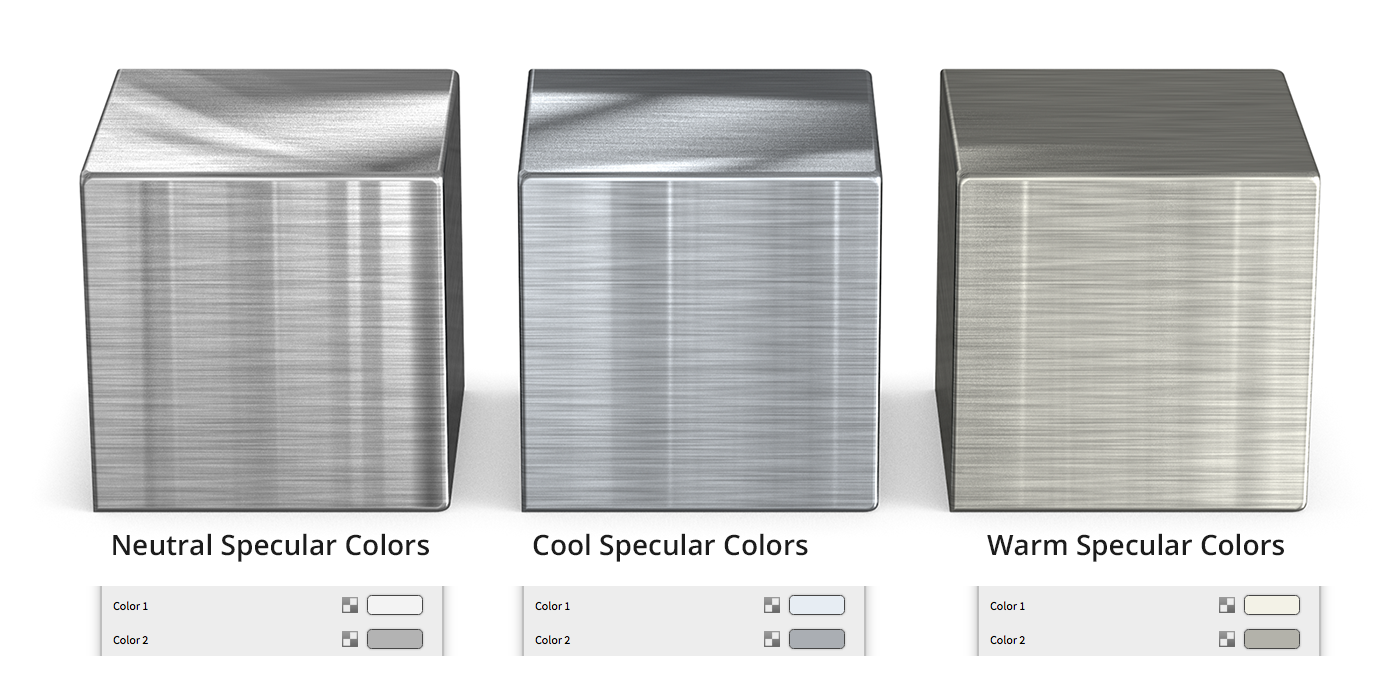
Using more contrast for these 2 colors will give you a more visible brush while less contrast makes a finer brush pattern. Consider the average value of the two colors as your overall specularity; Color 1 (90% grey) and Color 2 (70% grey) will give you an average of 80% grey/reflectivity. You can adjust both to lower values if your material is getting blown out by the lighting environment.
How to Render Radial Brush on Metals:
1. Set your Anisotropic Color and Specular colors as descrived above.
To get the best result when using the anisotropic material change the Color to pure black. We’ll define the reflections using the Specular color later. For now set Specular to a light grey, such as 85% grey.
2. Set your roughness direction Mode to Radial.
The image below shows you what radial reflections look like. You can use the “Position” button to define the center of the radial reflections on your geometry.
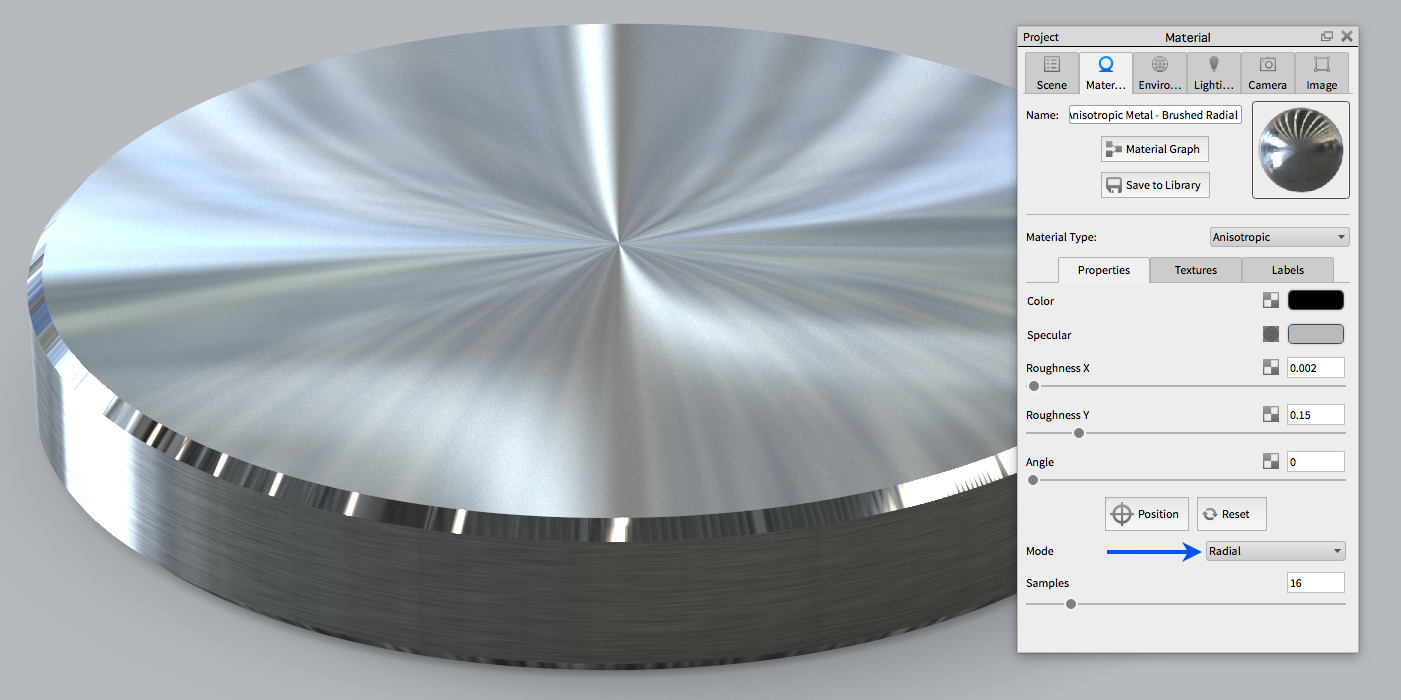
3. Add a Brushed (Radial) procedural texture to your Specular channel
Adding a Brushed (Radial) texture to your material increases the realism even more.

As always, increasing the material samples (12-32) will give you smoother quality on the material, while fewer samples (4-10) result in more visible noise or grain. This will depend on your desired results.
Usually the effect of the specular texture is enough to give the intended result, you can also duplicate the brushed texture on the bump channel and set it to a low value (.1 or .2, sometimes even smaller) to add more detail to the material.
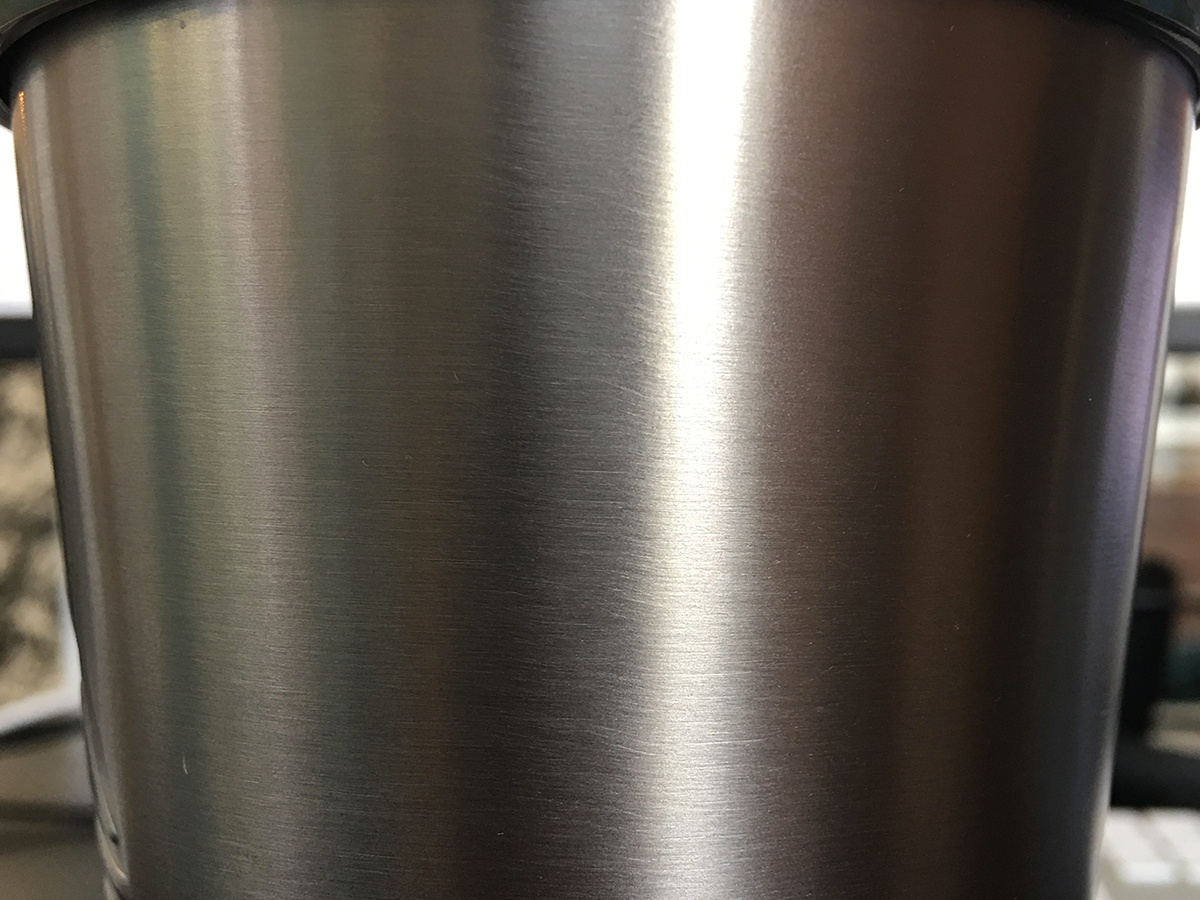
Download Stainless Steel Tumbler Scene
